
Cell phone cameras are everywhere today, and honestly, these little cameras with their positively tiny sensors are fantastic tools.
If you can use them well.
If you don’t believe me - check out Kalebra Kelby’s work, shot on her iPhone (www.kalebra.com). Using your cell phone camera is a great way to make some amazing images.
Will it replace a professional photographer? No. Even the most advanced smartphone with the best AI programming to help you get the most jaw-dropping images won’t be able to make up for the spontaneity, accuracy, and creativity of a human being. In addition, it will take practice. I’m really quite good with my cameras, but my cell phone? Not so much.
That being said, it is a convenient way to make some great images on the go. So I will present 3 tips that will help you get the most out of that portable camera. Please bear in mind, that I can’t go into specifics on your phone - simply because I am not beside you. (Though if you are interested, I can tailor a custom class on photography with your phone - contact me for details.)
Learn the functions on your camera app.
Open your camera app on your phone (unless you’re reading this on your phone, in which case maybe switch to a PC or tablet to read?). I bet there are a ton of icons all over the place, and most of them mean something cryptic to you. Here’s what the interface looks like on my S6.
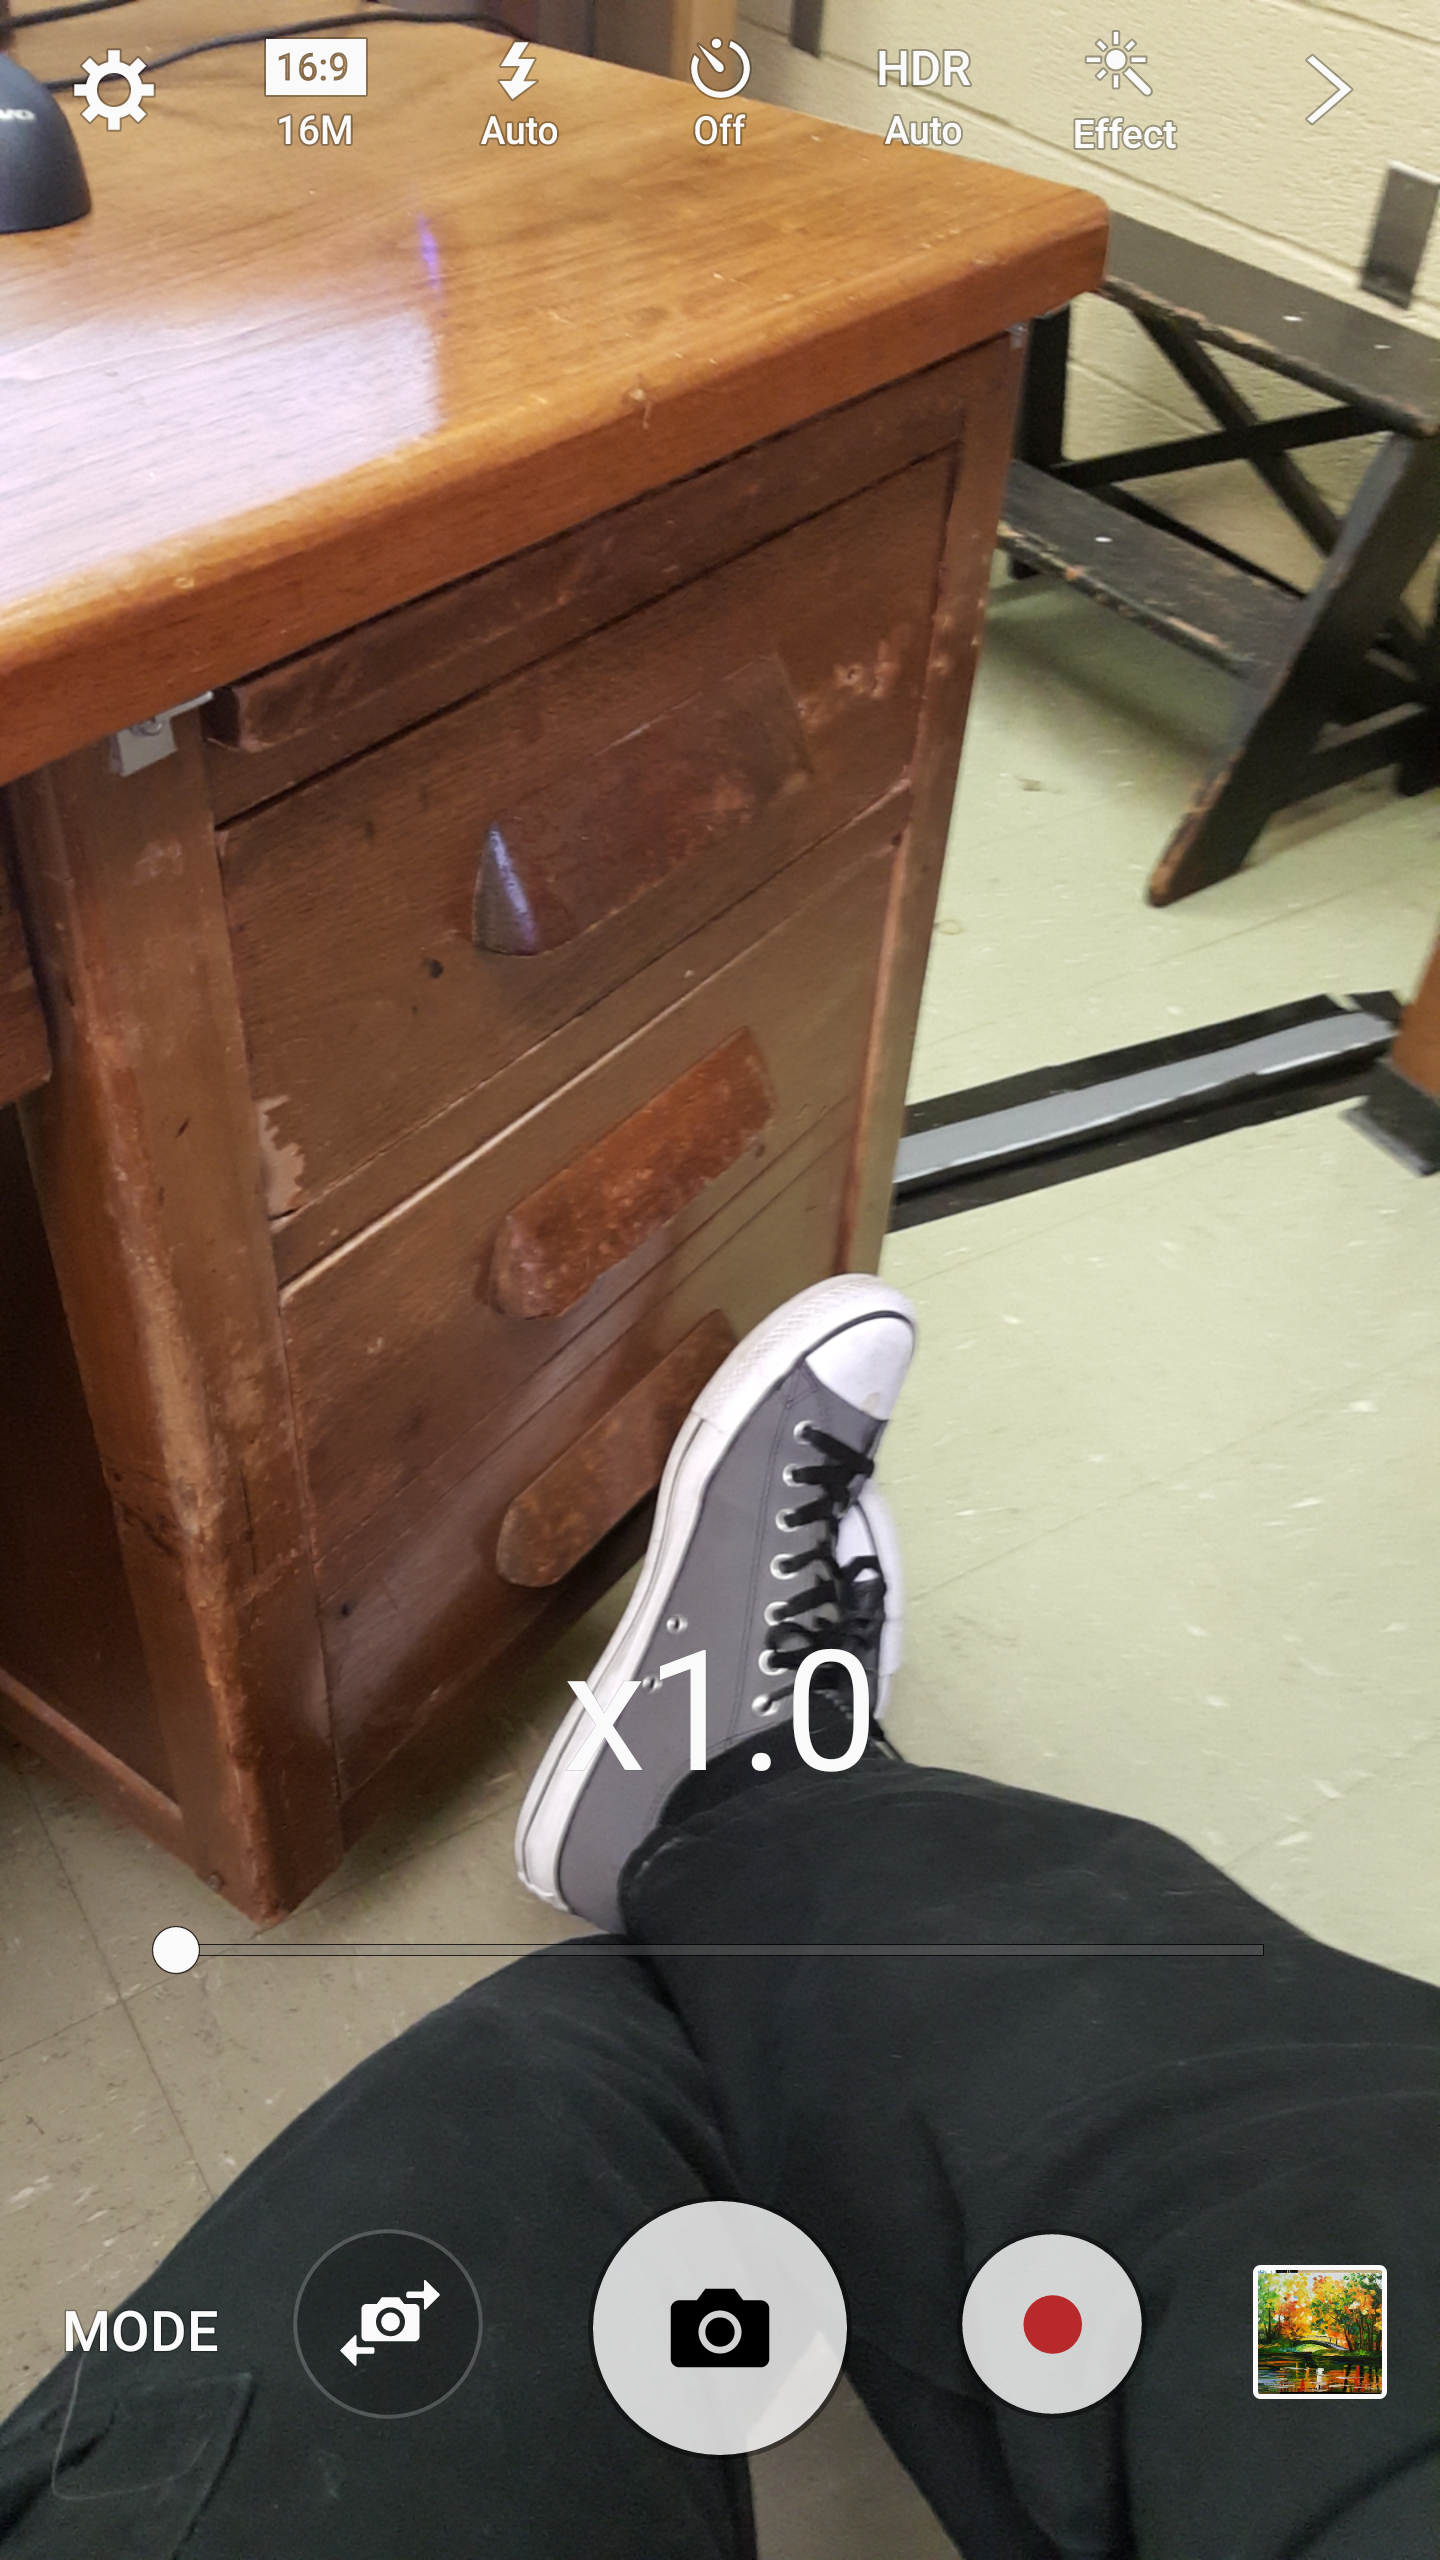
A screenshot of my photos app on my Galaxy S6
Yes, that is a photo of my shoes, in my office at NDMU. Yes, I teach in Chuck Taylors. Don’t judge me.
Let’s break down that top row of icons.

The top row of icons in the S6 camera app - briefly explained.
Now, what do those things do?! Well, the settings key does what you think it does - adjusts settings for the camera app.
The aspect ratio setting lets me pick between a bunch of different aspect ratios - which is the ratio of the length of the short to the long edge of an image (be it in pixels, inches, centimeters, or thumbs). 16:9 is what is pretty standard these days, but it used to be called widescreen. That was back when TV was broadcasted in standard which had an aspect ratio of 4:3. Most digital cameras will capture natively in a 2:3 format (though micro-four-thirds cameras capture in 4:3). Common print sizes like 8” x 10” and 16” x 20” share the same aspect ratio as Instagram - 4:5.
Which one to use? Well, that is at least partly dependent on your preference, and partly on the medium you want to use to display the image. I’ll go over aspect ratios in more detail on a future blog post (so consider setting yourself up for notifications to make sure you don’t miss it - e-mail me and I’ll put you on my e-mailing list).
The little lightning bolt symbol is the flash, right now I have it set to auto - and so the phone camera’s light meter will determine if the exposure needs the flash.
Here’s the thing though. The phone camera doesn’t know what you’re trying to achieve.
So, if you’re trying to get a dark, moody image in low light - it’s best to turn that flash to “off”. If you want to get photos of moving objects in low light - set it to “on” because you’ll need it. If you’re not sure, or you just don’t care enough, leave it on auto.
Next to the flash control is the self-timer. That way you can tap to capture an image, then run like a cheetah to get into place in the frame for an old-school selfie (or one where your arm isn’t holding up the phone). A great tool - if you can set the phone down in a safe and steady place, and know exactly where you need to be to get the composition you want.
To the right of the self timer is the HDR control. HDR stands for High-Dynamic Range. It’s a way of using multiple exposures to get more detail overall in an image - and is too broad a topic to cover in more depth here. The tl;dr for it is - if your images look “funky” and you don’t like it. Try turning it off - especially if your subject is very bright, or very dark the auto HDR can mess things up.
The last icon on the top row is the effect control. This lets you apply filters (a la IG) - at least on my device, most of them are awful and so I never use that setting to do anything other than make sure it’s normal/natural. Using them is a matter of personal taste - but be careful. Filters that are trendy right now will seem like really great ideas, but in a few years you’ll hate those images. I see it all the time.
On the bottom row, we have access to the mode key - which lets me pick from a buffet of different camera modes (including “Pro” mode, which gives me more control over the image and on my device allows me to shoot in RAW format), and those modes will vary based on your device and what you have installed. The only way to know what mode you should use for an image, is to practice with them and experiment.
Moving right from the mode selector is the front/rear camera swap, the stills capture button, the movie recording button, and the quick-access to my camera roll. None of these are worth spending a significant amount of text to discuss - I’m pretty sure you’re all well versed with their functions.
But how to use these things?! How do I learn it?
The key - as with most things in photography is to experiment until you find what you like. Practice is the sure fire way to improve anything. Practice a lot.
2. Zooming is for suckers.
Okay, you’ve figured out your camera and all the settings and modes and tools, and you see something you want to photograph but it’s super far away.
You could get closer, but moving is for suckers - right? Why move when you can zoom?
There’s two reasons you should move your feet - if you can.
First, most cell phone cameras (with exception to newer models with tri-lens or bi-lens systems) can’t actually zoom at all. They “zoom” by simply cropping into your image. This causes what could be a beautifully sharp image to become soft, and at the extremes, pixelated (meaning you can see the individual blocks that make up the image). Here, I’ll show you.

On the left, the original framing. On the right the digital zoom. Note the marked loss of sharpness and overall image quality.
Second, and this is less important if you’ll only ever display digitally, you’re throwing away pixels if you use a digital zoom on a phone. This will hurt your ability to get large prints made down the road (in addition to the other problems you’re going to have that I mentioned above).
Don’t zoom. MOVE YOUR FEET.

Image made by moving the phone closer to the subject - note how you can still see the warp and weft of the tablecloth, unlike in the digital zoom above.
“But Ben!” I hear you cry, “I can’t move! There’s this thing in my way, and even if I could move then my subject would go out of frame and…”
In that case, zooming is your only option. Be aware of what will happen and be mindful as you work.
3. Be aware of the angle of your sensor plane.
No, I’m not talking in moon-speak. Your camera is a lens that focuses your image onto the sensor. This sensor is a flat silicon plate full of light sensors called pixels. This sensor is affixed in your phone to be parallel with the front and back screens.
So what does this have to do with your photos?
Ever see a photo of someone that they took with their phone, and it looks like they’ve got shrunken head syndrome?

Notice how in this super blurry snapshot my head looks too small for my body.
That’s caused by having the phone tilted away from the subject - see the image is skewed by the way that the sensor plane is angled relative to the subject. Likewise, you can see a reverse effect with a reverse angle.

Yet in this image - it looks like my head is oversized.
Want the best selfies ever where your face and body aren’t distorted at all? Make sure that phone is parallel to your body plane.

I managed to keep my facial features from distorting by carefully ensuring that my phone was parallel to my body plane.
Want to minimize your waist? Maybe tilt the phone a little - go for the classic selfie angle (overhead, tilted slightly towards you).

The Classic Selfie pose.
Just don’t give yourself shrunken head syndrome.
Want lessons? Give me a shout.